
Donnerstag, 27. September 2012
Oktoberfest Munich 2012
Hey :-)
Heute geht es für mich los aufs Oktoberfest. Ich habe schon den ganzen Morgen gepackt und verzweifelt versucht alles in einen kleinen Koffer und eine Handtasche zu bekommen. Jetzt, eine Stunde vor Abfahrt, hab ich es endlich geschafft! :-)
Ich freue mich schon total, das Wetter soll super werden, besser kann es gar nicht laufen.
Edit:
Nach dem Oktoberfest:
Ich bin total krank! Niesen, husten, Halsschmerzen, bäh. ABER: Es war echt genial! :-) Hier noch ein paar Tipps, falls es euch mal dorthin verschlägt:
1. Niemals ohne Tracht! Dirndl ist ein Muss!
2. Eine Plastiktüte ist euer bester Freund! (Jackenschutz, Regenschirm, Sitzschutz...)
3. Eine kleine Tasche mit Reißverschluss, die ihr nah am Körper tragen könnt.
4. Je nach Wetter auch feste Schuhe einplanen
5. Bei mehr als 2 Personen (zumindest am WE) reservieren oder schon ab 8 Uhr vor den Zelten warten
6. Desinfektionsgel ist manchmal ganz angenehm für die Hände ;-)
7. Achtet auf eure Krüge und Taschen! Beides solltet ihr nicht aus den Augen lassen.
8. Geht, vor allem als Mädels, abends nicht allein über das Gelände.
9. Wenn ihr euch betrinken wollt, kümmert euch vorher darum wie alle abends sicher heim kommen
10. Vip-Bereich ist nicht immer das beste! Wir standen da schon enger gequetscht und hatten schlechtere Toiletten als im normalen Zeltbereich unten ;-) (Stichwort Hippdrom)
11. Hausschlüssel habt ihr sicher verstaut, wenn ihr ihn am Bh-Träger befestigt.
Fazit:
Wir hatten viel Glück und sind immer in die Zelte rein gekommen. Gezahlt habe ich in 2 Tagen 9,50€ für eine Maß, 3,50€ für Wurst im Brötchen und 5,50€ für einen Wrap mit Fisch und Salat. Der Rest wurde uns bezahlt, von unterschiedlichen Leuten, die uns an ihren Tisch oder den Vip-Bereich eingeladen haben.
Grundsätzlich: Je größer die Gruppe, desto mehr Spaß aber auch desto schwieriger einen Tisch zu bekommen oder überhaupt in die Zelte zu gelangen (ohne Reservierung).
Tickets für die Bahn gibt es zu unterschiedlichen Preisstufen und Tagen. Wir haben uns 2x ein Partnerticket geholt, das waren 10,20€ für jeden (insgesamt), ab 3 Tagen wird es pro Tag gerechnet schon günstiger.
Ein Erlebnis ist das Oktoberfest in jedem Fall!
Hey :-)
Today is the day! I am travelling to Munich to visit the Oktoberfest. I spend the whole morning with all my stuff on the floor, desperately trying to fit it all in a bag and a small suitcase. Now, one hour before I have to leave the house I finally made it! :-)
I am so excited about going to the Oktoberfest! The wether will be fine, I am in a good mood, it couldn't be any better.
Edit:
After the Oktoberfest:
I am totally ill. A cold, sneezing, my throat hurts... BUT it was great :-) Here a few tipps in case you want to go there as well.
1. Never without Dirndl!
2. A plastic bag is your best friend! (protects you jacket, is an umbrella, a seat...)
3. A little bag you can carry close to your body
4. Take shoes for every wether
5. More than 2 persons should reservate (at the weekend) or be in front of the tent at 8!
6. You might want to use desinfection gel... ;-)
7. Have an eye on your glasses and bags!!!
8. Girls should not walk around alone (at least not in the evening when everybody is drunk!)
9. If you want to get drunk, make sure you know how to get home before you do
10. Vip-area is not always the place to be. We had little space and dirty toilets. The normal tent area was better! (hippodrom)
11. Fix your key to your bra stripe, you wont lose it as you (hopefully) don't lose your bra.
Conclusion:
We were very lucky and got inside all of the tents we wanted. I paid 9,50€ for one beer, 3,50€ for sausage in bread and 5,50€ for a wrap with fish and salad in two days. All the rest got paid for us by people that invited us to their table or the Vip-area.
Generally: The bigger the group the more fun you have but the more difficult it gets to go inside the tents or get a table (without reservation).
You can buy tickets for different number of days and persons. We bought a partnerticket for each day which was 10,20€ for each of us (in sum). For 3 days you pay even less per day.
Finally the Oktoberfest is defnitely worth visiting!
Mittwoch, 26. September 2012
Lovesickness
Hey guys,
One of the very few posts, that is in English only. This is about how to get rid of lovesickness within 7 days.
Have fun and hopefully feel better soon <3
Three basic rules for those 7 days:
Day 1:
Cry! You are right. All that "how could he do this to me?" "What have I done?" "I will never find someone like him again..." YES! I agree, you are completely right. On your first D.A.S. (Day After Separation) all this is fine. Eat chocolate, crisps, get your old Whitney Houston CDs out and just feel awfully bad!
Day 2:
Have a look in the mirrow. Yesterday you cried the whole day and probably the whole night. If you are no super pretty "my face does not get red when I cry but I look awesome instead" then you will have a swollen nose, small, swollen eyes, a red face... let's just say: You don't look your best on that day. So who's fault is it? - It's his fault! He made you look like this! And all that calories yesterday? - It's him again! Is he worth all that? Is he worth looking like that and feeling even worse because of what you have done the day before? NO!
So look around, are there things he gave you? Pictures, teddybears, jewlery.... Don't worry, you don't have to throw it away, but you have to get yourself a box and put it all in. A box you can lock and put in your basement!
Day 3:
If you managed to keep away from facebook till today, you are great! This is exactly how you should go for it! So time to get yourself something pretty. Go shopping! You deserve something new. It is not necessary to change your hair (that's so much cliche...) better invest in a nice dress, new makeup or maybe you could do something new in your room?
Sometimes it just sucks to be reminded how you were sitting on that couch with him, looking at that picture... So if you can't buy new furniture, just rearrange it! Get your girls to help you and be creative. You can also just paint furniture or decorate in a different way. The main point is that you feel better with it!
Day 4:
A night with the girls! Sit together and pull him to pieces! If you are allowed to, have a nice sparkling wine. The important thing is: Have a nice evening! Not a we-cry-together-because-he-is-gone!
You can also go for a party if you want to (and you are old enough :-)).
Day 5:
Now we are getting a bit nasty. Honestly: Who wants to look their best in socail networks, hands up! You see, we all want to. So you task for today is to get new beautiful pictures of yourself and upload them somewhere he can see. No need to tell him or write something below the picture for him. Just make sure you look your best and not like you have been crying about him.
This is your way saying: I am having a good time without you!
Day 6:
This is a bit difficult and it is up to you whether you do that or not. Usually every girl has some guy that once contacted her but she was not too interested in him. Maybe you have such a boy and his number or facebook account somewhere around... Just write him!
It is mean, but sometimes it is good to have someone that makes you feel great and sexy. Plus he maybe writes a nice comment below your new picture or on your wall (there is nothing more effective you make your ex mad! Men check facebook profiles, too. They just don't admit it ;-)).
To make that sure: I don't say visit him for the night or anything like that! I am only talking about writing!
Day 7:
Think of what you have done the last days. All his stuff is out of your way, you have beautiful new pictures, had a great evening with your friends, probably a new looking room and a nice person to write to.
Do you need him to have a good time?
Don'ts
One of the very few posts, that is in English only. This is about how to get rid of lovesickness within 7 days.
Have fun and hopefully feel better soon <3
Three basic rules for those 7 days:
- Don't contact him
- Don't click his profile (on Facebook or elsewhere)
- Don't poste how bad you feel or any comments in the third person (..."she still loved him but he could not see...")
Day 1:
Cry! You are right. All that "how could he do this to me?" "What have I done?" "I will never find someone like him again..." YES! I agree, you are completely right. On your first D.A.S. (Day After Separation) all this is fine. Eat chocolate, crisps, get your old Whitney Houston CDs out and just feel awfully bad!
Day 2:
Have a look in the mirrow. Yesterday you cried the whole day and probably the whole night. If you are no super pretty "my face does not get red when I cry but I look awesome instead" then you will have a swollen nose, small, swollen eyes, a red face... let's just say: You don't look your best on that day. So who's fault is it? - It's his fault! He made you look like this! And all that calories yesterday? - It's him again! Is he worth all that? Is he worth looking like that and feeling even worse because of what you have done the day before? NO!
So look around, are there things he gave you? Pictures, teddybears, jewlery.... Don't worry, you don't have to throw it away, but you have to get yourself a box and put it all in. A box you can lock and put in your basement!
Day 3:
If you managed to keep away from facebook till today, you are great! This is exactly how you should go for it! So time to get yourself something pretty. Go shopping! You deserve something new. It is not necessary to change your hair (that's so much cliche...) better invest in a nice dress, new makeup or maybe you could do something new in your room?
Sometimes it just sucks to be reminded how you were sitting on that couch with him, looking at that picture... So if you can't buy new furniture, just rearrange it! Get your girls to help you and be creative. You can also just paint furniture or decorate in a different way. The main point is that you feel better with it!
Day 4:
A night with the girls! Sit together and pull him to pieces! If you are allowed to, have a nice sparkling wine. The important thing is: Have a nice evening! Not a we-cry-together-because-he-is-gone!
You can also go for a party if you want to (and you are old enough :-)).
Day 5:
Now we are getting a bit nasty. Honestly: Who wants to look their best in socail networks, hands up! You see, we all want to. So you task for today is to get new beautiful pictures of yourself and upload them somewhere he can see. No need to tell him or write something below the picture for him. Just make sure you look your best and not like you have been crying about him.
This is your way saying: I am having a good time without you!
Day 6:
This is a bit difficult and it is up to you whether you do that or not. Usually every girl has some guy that once contacted her but she was not too interested in him. Maybe you have such a boy and his number or facebook account somewhere around... Just write him!
It is mean, but sometimes it is good to have someone that makes you feel great and sexy. Plus he maybe writes a nice comment below your new picture or on your wall (there is nothing more effective you make your ex mad! Men check facebook profiles, too. They just don't admit it ;-)).
To make that sure: I don't say visit him for the night or anything like that! I am only talking about writing!
Day 7:
Think of what you have done the last days. All his stuff is out of your way, you have beautiful new pictures, had a great evening with your friends, probably a new looking room and a nice person to write to.
Do you need him to have a good time?
Don'ts
- Clicking his Facebook profile
- contact him
- contact his friends
- pulling him to pieces in public
- third person postings (see above)
- posting how bad you feel
- beeing online all the time (if you are at least put "appear as offline")
- comparing yourself to girls he might go out with now
- making everyone see that you have a new guy (bad reputation!)
- immediatly answering to his texts (wait at least 2 hours or don't answer at all)
- looking at old pictures the whole time
- pretending your whole relationship has been perfect
Dienstag, 25. September 2012
Herbstschmuck / Autum jewlery
+-+Kopie.JPG) Eine super tolle Kette von Bijou Brigitte. Ich habe sie mir passend zu meinem Dirndl gekauft, aber auch so finde ich sie klasse.
Eine super tolle Kette von Bijou Brigitte. Ich habe sie mir passend zu meinem Dirndl gekauft, aber auch so finde ich sie klasse. Das braun ist schön herbstlich und passend zu dem Wetterumschwung, der jetzt (leider) langsam kommt, aber trotzdem eine kleine Erinnerung an den Frühling.
Die Steine in der Mitte leuchten etwas heller, wenn Licht auf die Kette fällt, die Lederbänder geben einen etwas natürlicheren Touch.
So gekauft für 9,95€ :-)

The brown is lovely now that autumn comes while the flower reminds me of spring. I really like that combination!
The middel parts sparkle in a lighter brown, when sunlight (or any other ;-)) hits them. The leather bands make it look more natural.
Paid 9,95€ :-)
Mittwoch, 19. September 2012
Manhattan Perfect Adapt Make Up

+-+Kopie.JPG)
Hier ein Make-Up, das ich sehr lange verwendet habe und auch nach wie vor (unter bestimmten Umständen) empfehlen würde.
Das Perfect Adapt Make-Up ist recht flüssig und lässt sich gut verteilen. Es deckt gut und riecht angenehm (also kaum Geruch ;-)). Mit diesem Make-Up hatte ich keinerlei Probleme bezüglich Make-Up-Rand oder Ähnlichem, es ist also wirklich Perfect Adapt.
Der Nachteil ist, dass es nicht mattiert. Man muss in jedem Fall einen Puder zusätzlich benutzen und ich hatte das Problem, dass meine Haut sehr ölig wurde.
Das ist auch das Kernproblem, warum ich dieses Make-Up nur eingeschränkt empfehle. Normalerweise achte ich nicht zu sehr auf Inhaltsstoffe, da ich mich damit auch nicht auskenne. In diesem Fall habe ich mich informiert und herausgefunden, dass dieses Make-Up komedogen wirkt. Das bedeutet, wenn ihr zu Pickeln und unreiner Haut neigt, solltet ihr dieses Produkt nicht verwenden, da es die Unreinheiten noch begünstigt.
Der kritische Inhaltstoff ist Isopropylmyristat, möglicherweise sind noch andere enthalten, dieser steht nur auf der Liste, die ich von meiner Hautärztin bekommen habe.
Wer also gute Haut hat und auch sonst nicht empfindlich reagiert, wird Freude an dem Perfect Adapt Make Up haben, für mich war es leider auf lange Sicht nichts.
Der Preis lag um die 7€ für 30ml.
This is a make-up that I used quite a long time and that I would recommend (under certain circumstances).
The Perfect Adapt Make Up by Manhattan is liquid and easy to apply. It covers very well and has a nice smell (nearly no smell ;-)). With this product I had no problems like a make up line on my neck or close to my hair, so it really is Perfect Adapt.
The Disadvantage is that it does not mattify. You have to use a powder in any case with this make up. My personal problem was, that I got very oily skin when I used it and this is also the main point why I would not recommend it to everybody.
Usually I am not too much into ingredients but this time I informed myself and checked the make up. The result is, that the Perfect Adapt Make up is comedogenic. This means that if you have breakouts, oily skin or sensitive skin the make up might cause further breakouts and uneveness on your skin.
The critical ingredient is Isopropyl Myristate, probably others as well but this one is on the check-list I got from my dermatologist.
So if you have flawless skin and not sensitive skin you will love this make up!
I paid about 7€ for 30ml.
Maybelline New York - Terra Sun bronzing powder

Der Terra Sun bronzing powder von Maybelline New York ist mein liebster Puder. Er glitzert nicht und verleiht eine leichte Bräune, aber nicht so stark, dass es sich unnatürlich vom Rest des Gesichts abhebt. Außerdem deckt er ganz gut und hat einen tollen sommerlichen Geruch.
Ich habe ihn in der Farbe 01 Light Bronze und denke, dass es für einen leichten Effekt voll ausreicht.
Mit einem Pinsel lässt sich der Puder gut auftragen, erkennen kann man ihn an dem Sonnenemblem im Inneren der Packung.
Gerade im Winter ein tolles Extra, um nicht den letzten Rest Sommerbräune zu verlieren :-)
Der Puder ist nicht komedogen, also auch für unreine Haut geeignet.
(Mehr Infos und nicht komedogene Produkte findet Ihr hier).

The Terra Sun bronzing powder by Mabelline New York is my favourite powder. It has no glitter in it and gives a light bronzing to the skin but not in a way that it looks unnaturally to the rest of the face.
Additionally it covers quite good and has a nice summer smell.
I have it in the colour 01 Light Bronze and think it is the best to have a slight effect.
With a brush you can easily apply the powder. Remarkable is its sun emblem inside the package.
Especially in winter this is great to keep some of your colour :-)
The powder is non-comedogenic, so you can use it as well if you have some skin problems.
(More infos and non-comedogenic products are here).
Manhattan - 2 in 1 Perfect Teint Powder & Make up

Für alle, die schon immer zu faul waren Make-Up und Puder immer herum zu tragen ist dieses Produkt das richtige.
Das 2 in 1 Perfect Teint von Manhattan ist Puder und Make-Up in einem. Verwendet man das Produkt so, ist es ein Puder, macht man den beiliegenden Schwamm nass, wird es zum Make-Up.
Meine Erfahrung ist, dass man es meistens nicht nass machen muss. Schon als Puder deckt es mehr und besser als normale Puder, allerdings braucht man eine gewisse Menge, um das gesamte Gesicht abzudecken.
Von der Haltbarkeit war ich mäßig begeistert, über den Tag muss man noch einmal nachlegen!
In der Packung sind 9g des Puder-Make-Ups, ein Schwämmchen und ein Spiegel. Ich erinnere mich nicht genau an den Preis, aber er lag knapp unter 10€.
Gekauft habe ich es damals, weil ich im Winter sehr blasse Haut hatte und ein helleres Make-Up als sonst brauchte. Der Ton ist Rose 17 und heute kann ich ihn fast als Concealer verwenden :-)
Soweit ich es beurteilen kann, ist das Produkt nicht komedogen, es ist also auch für unreine Haut geeignet.
(Die Liste mit Inhaltsstoffen und andere nicht komdeogene Produkte findet ihr hier)
An sich eine super Lösung für mehere Problemfälle.

For everybody who is too lazy to carry around make up AND poweder: The 2 in 1 Perfect Teint by Manhattan. Use it dry and it will work as a powder. Use a wet sponge and you have a make up.
My experience is, that usually it works out very well to use it only as a powder as it covers very well. It covers better than normal powders but you need a certain amount to have a good base on your skin. The durability on the skin did not really convince me because I had to refresh it several times during the day.
There are 9g in the package plus a sponge and a mirrow. I don't remember the exact price but it was a bit less than 10€.
I bought it because I had very pale skin in winter and my normal make up got to dark for me.
The colour I chose is Rose 17 and now I can use it as a concealer ;-)
As far as I can say the product is non-comedogenic, so even with sensitive skin and breakouts you can use it without making things worse.
(The list of ingredients and further non-comedogenic products are here)
In my opinion this product serves several problems in one.
Maxfactor - Smooth Effect Foundation

Die Smooth Effect Foundation von Maxfactor hat mich in den Punkten Deckkraft und Hautgefühl voll überzeugt.
Die Foundation ist sehr cremig und lässt sich gut verteilen. Schon eine dünne Schicht deckt jede Rötung und Unebenheit ab. Trotzdem fühlt man sich nicht zugekleistert.
Ich habe darüber das clear & matt make up von Essence benutzt und damit eine komplette Partynacht bestritten. Es hat alles gehalten, keine Ränder und kein ekliges Gefühl auf der Haut.
Zu den Inhaltsstoffen kann ich leider nichts sagen, da auf der Packung einfach keine angegeben sind. Ich benutze es nicht jeden Tag, daher kann ich auch keinen Effekt auf meiner Haut beobachten.
(Falls jemand etwas zur komedogenen Wirkung weiß, hinterlasst doch bitte einen Kommentar :-))
Die Foundation hat 10€ für 30ml gekostet. Nicht billig, aber ich würde sagen, sie ist ihr Geld wert!
Für meinen Hautton hat die Farbe Sand 60 gut gepasst, ich hab die Foundation noch in einem helleren und einem dunkleren Ton gesehen.
The Smooth Effect Foundation by Maxfactor really persuaded me in the points coverage and feeling on my skin.
It feels like cream and is easy to apply. Already a thin layer covers redness, breakouts and all other kinds of unevenness. Though my face looks like painted in one colour I do not feel like I have a lot on my skin, it does not stick or create a hot feeling.
I wore the clear & matt make up by essence and it stayed a whole party night. No make up lines or oily feeling.
Unfortunately I cannot tell anything about the ingredients (the package doesn't tell) and as I do not wear it every day I did not recognise an effect on my skin.
(If somebody has negative experiences on their skin, please feel free to leave a comment :-))
I paid 10€ for 30 ml. Not cheap but the foundation worked so well that I liked to spend the money on it.
My skin colour fitted best the colour Sand 60, but I saw the foundation in a lighter and a darker colour as well.
Manhattan - Soft Mat Loose Powder

Dies ist der Soft Mat Loose Powder von Manhattan. Ich benutze ihn noch nicht sehr lange, finde ihn aber als losen Puder toll!
Er mattiert super und fixiert Lidschatten, Lippenstift und Make-Up (als Grundlage, bzw. im letzten Fall oben drüber).
20 g finde ich allerdings für einen Preis von knapp 9 € relativ wenig. Außerdem ist die Packung relativ schwer zu öffnen. Die enthaltene Quaste verwende ich nicht, sondern nur meinen Pinsel. Für unterwegs ist sie aber sicherlich sehr praktisch.
Der Puder hat keinen starken Eigengeruch. Auf der Rückseite steht, der Puder sei besonders für Mischhaut und ölige Haut geeignet. Bisher kann ich nichts Gegenteiliges behaupten. Ich habe die Inhaltsstoffe des Soft Mat Loose Poweders mit meiner Inhaltsstoffliste abgeglichen und konnte nicht komedogenes (also Unreinheiten förderndes) finden.
(Die Liste und weitere Produkte für Unreine Haut findet ihr hier).
Zu beachten ist allerdings, dass die Farbe etwas hell ausfällt. Bei meinem Perfect Adapt Make Up von Manhattan hatte ich immer den Ton Beige, im Falle des Puders ist Beige ein wenig zu hell für meinen Hautton.
Schlussendlich würde ich den Puder jedem empfehlen, der nach einem guten Produkt sucht und für den der Preis nicht ausschlaggebend ist.
This is the Soft Mat Loose Powder by Manhattan. I don't use it for a long time but I already love it as it is my first loose Powder.
It is super mattifying and sets eyeshadow, lipstick and make up (as a base or on top).
I personally think that about 9€ is quite expensive for 20g of powder.Plus the package is hard to open (be careful that you don't spill it!).
Inside is as well a pad to apply the powder but I use my brush to do it. Nevertheless it is quite useful when you want to use it at school in the train or elsewhere.
On the back of the package it says that the poweder is especially for combination and oily skin. So far I did not make any other experience with it. It does not harm my skin and it passed the check with my ingredients list: It is non-comedogenic (which means it does not encourage breakouts).
(The list and further non-comedogenic products are here)
Important to know is, that the colour is a bit lighter than usually. With my Perfect Adapt Make Up by Manhattan I had Beige as well, but this time the beige is a bit to light for me, so test it well :-)
Finally I would recommend the poweder to every person who is looking for a great product and not afraid to spend some money.
Essence - bronzing compact powder
(Please scroll down for English version)
.JPG) Den compact powder von essence habe ich schon eine ganze Weile in der Ausführung matt. Der Puder ist wirklich sehr sehr dunkel und wird auf das gesamte Gesicht angewendet schnell fleckig.
Den compact powder von essence habe ich schon eine ganze Weile in der Ausführung matt. Der Puder ist wirklich sehr sehr dunkel und wird auf das gesamte Gesicht angewendet schnell fleckig.
Deswegen würde ich ihn als Puder nicht weiter empfehlen.
Genial aber ist er als Rouge! Der Ton hebt sich schön ab und ist gut geeignet um Konturen zu zeichnen oder die Wangen zu betonen.
Abgesehen davon ist er nicht komedogen, kann also auch bei Problemhaut verwendet werden.
(Mehr zu nicht-komedogenen Produkten findet ihr hier).
Für den Puder habe ich um die 5 € gezahlt und er hält schon Ewigkeiten. Meiner Ansicht nach ein schönes Basicprodukt, das man immer wieder verwenden kann.
English
I have the compact powder by essence quite a while now in the matt version. The powder is really dark and it is hard to apply it evenly on the whole face. So I would not recommend to use it as a powder.
But, as a blush! The colour has a great contrast to the normal skin colour and is nice to create contours on your face.
The product is non-comedogenic, so you can also use it when you have bad skin and breakouts.
(More non-comedogenic products are waiting for you here).
I paid about 5 € for the powder and it lasts and lasts. I think it is a great basic product that can be used over and over again.
.JPG)
Deswegen würde ich ihn als Puder nicht weiter empfehlen.
Genial aber ist er als Rouge! Der Ton hebt sich schön ab und ist gut geeignet um Konturen zu zeichnen oder die Wangen zu betonen.
Abgesehen davon ist er nicht komedogen, kann also auch bei Problemhaut verwendet werden.
(Mehr zu nicht-komedogenen Produkten findet ihr hier).
Für den Puder habe ich um die 5 € gezahlt und er hält schon Ewigkeiten. Meiner Ansicht nach ein schönes Basicprodukt, das man immer wieder verwenden kann.
English
I have the compact powder by essence quite a while now in the matt version. The powder is really dark and it is hard to apply it evenly on the whole face. So I would not recommend to use it as a powder.
But, as a blush! The colour has a great contrast to the normal skin colour and is nice to create contours on your face.
The product is non-comedogenic, so you can also use it when you have bad skin and breakouts.
(More non-comedogenic products are waiting for you here).
I paid about 5 € for the powder and it lasts and lasts. I think it is a great basic product that can be used over and over again.
Hautfreundliches Make-Up / Skinfriendly Makeup
(Please scroll down for English version)
Hey :-)
hier findet ihr eine Sammlung von Produkten, die ihr verwenden könnt, auch wenn ihr unreine Haut habt. Alle hier aufgeführten Produkte sind nicht-komedogen. Grundlage dafür ist die Liste von komedogenen Inhaltsstoffen, die ihr auch auf dieser Seite findet.
Die Liste beinhaltet die schlimmsten Inhaltsstoffe und ich habe sie von meiner Hautärztin bekommen. Es mag also sein, dass einige der Produkte ungünstige Stoffe enthalten, die in dieser Liste aber nicht aufgeführt wurden, weil sie keine direkte "Gefahr" darstellen.
Ich selbst kenne mich mit Inhaltsstoffen nicht aus, daher bin ich ganz dankbar für diese Liste als Leitfaden und hoffe sie hilft dem ein oder anderen von euch auch weiter.
Nicht komedogene Produkte:
Komedogene Inhaltsstoffe (Wenn euch weitere bekannt sind, hinterlasst gerne einen Kommentar):
Hey,
this is a page where I present links to non-comedogenic products to you. This means products that you can use even if you have breakouts, whiteheads and other skin problems, without making things worse. The list of products is based on a list with bad ingredients that you find below. I think the list is not complete but I got it from my dermatologist and those are the main enemies of flawless skin ;-)
I don't know much about ingredients so I am very thankful to have a list and want to share that with you.
Hopefully this is helpful for some of you :-)
Non-comedogenic products:
Comedogenic ingredients ( If you know of more feel free to leave a comment):
Hey :-)
hier findet ihr eine Sammlung von Produkten, die ihr verwenden könnt, auch wenn ihr unreine Haut habt. Alle hier aufgeführten Produkte sind nicht-komedogen. Grundlage dafür ist die Liste von komedogenen Inhaltsstoffen, die ihr auch auf dieser Seite findet.
Die Liste beinhaltet die schlimmsten Inhaltsstoffe und ich habe sie von meiner Hautärztin bekommen. Es mag also sein, dass einige der Produkte ungünstige Stoffe enthalten, die in dieser Liste aber nicht aufgeführt wurden, weil sie keine direkte "Gefahr" darstellen.
Ich selbst kenne mich mit Inhaltsstoffen nicht aus, daher bin ich ganz dankbar für diese Liste als Leitfaden und hoffe sie hilft dem ein oder anderen von euch auch weiter.
Nicht komedogene Produkte:
- Maybelline New York - Terra Sun bronzing powder
- Manhattan - 2 in 1 Perfect Teint Powder & Make up
- Manhattan - Soft Mat Loose Powder
- Essence - bronzing compact powder
Komedogene Inhaltsstoffe (Wenn euch weitere bekannt sind, hinterlasst gerne einen Kommentar):
- Butylstearat
- Cetylalkohol
- Hexylenglycol
- Isopropylmyristat
- Lanolin
- Na-Laurylsulfat
- Polyäthylenglycol 300
- Sesamöl
- Stearinsäure
- Schwefel
Hey,
this is a page where I present links to non-comedogenic products to you. This means products that you can use even if you have breakouts, whiteheads and other skin problems, without making things worse. The list of products is based on a list with bad ingredients that you find below. I think the list is not complete but I got it from my dermatologist and those are the main enemies of flawless skin ;-)
I don't know much about ingredients so I am very thankful to have a list and want to share that with you.
Hopefully this is helpful for some of you :-)
Non-comedogenic products:
- Maybelline New York - Terra Sun bronzing powder
- Manhattan - 2 in 1 Perfect Teint Powder & Make up
- Manhattan - Soft Mat Loose Powder
- Essence - bronzing compact powder
Comedogenic ingredients ( If you know of more feel free to leave a comment):
- Butyl Stearate
- Cetyl Alcohol
- Hexyne Glycol
- Isopropyl Myristate
- Lanolin
- Sodium Lauryl Sulfate
- PEG-12
- Sesamum Indicum
- Stearic Acid
- Sulfur
Samstag, 15. September 2012
essence - XXXL shine

(please scroll down for English version)
Hey :-)
Den XXXL shine von essence hab ich in den Farben 021 red blossom und 18 sparkling papaya getestet. Der Test fiel überraschenderweise fiel der Test für die beiden Farben unterschiedlich aus.
Zuerst die Gemeinsamkeiten:
Beide riechen sehr fruchtig aber künstlich (wie Kaugummi).
Die Farben in dem Röhrchen sehen sehr intensiv aus.
Der Lipgloss klebt ein wenig.
Beide schimmern sehr schön.
Der Applikator ist etwas lang und daher etwas umständlich zu benutzen
Der entscheidende Unterschied:
Während der red blossom (also der knallig rote) sich noch einigermaßen deckend verteilen lässt, scheitert der sparkling papaya leider ganz. Bei beiden braucht man eine ordentliche Menge, damit wirklich die gesamten Lippen nicht nur mit Glitzer, sondern auch mit Farbe bedeckt sind. Der sparkling papaya hat aber eher etwas von einem nude Gloss als von dem knalligen Orange, das er in der Packung hat. Den red blossom würde ich noch so tragen, den sparkling papaya nur als Topcoat auf einem matten Lippenstift.
Pro Lipgloss habe ich um die 1,80€ bezahlt, nicht viel, aber im Falle des sparkling papaya hätte ich mir diese 1,80€ gerne gespart.
Insofern eine eingeschränkte Kaufempfehlung. Es kommt ganz darauf an, wofür man einen Lipgloss sucht: Als strahlenden Eyecatcher oder doch nur als Beiwerk um Lippenstift zu verfeinern.
Hey :-)
I bought the XXXL shine by essence in the colours 021 red blossom and 18 sparkling papaya and tested them both. I thought they would be at the same level but they have one huge difference.
First what they have in common:
Both smell very fruity but artificial (like bubble gum).
Both colours look very intensive in the tube.
The lipgloss sticks a bit on the lips.
Both have a nice shimmer.
The brush is very long which makes it a bit complicated to apply the gloss.
The main difference:
While the red blossom one at least covers the lips, the sparkling papaya does not convince me at all. Both have to be applied in a huge amount on the lips to create one even colour. But the sparkling papaya has more of a nude gloss than the bright colour it has in the tube. I would wear the red blossom one without extras, the sparkling papaya only as an extra shimmer on lipstick.
I paid about 1,80€ per lipgloss, which is not much but in case of the sparkling papaya I would have prefered to save those 1,80€.
I would recommend to buy the gloss depending on what you buy it for. If you are looking for a strong colour better buy something else.
Freitag, 14. September 2012
Plus White - 5 Minute Speed Whitening Gel Sensitive
.JPG) (please scroll down for English version)
(please scroll down for English version)Hey,
hier mein Erfahrungsbericht für alle, die gerne weißere Zähne hätten. Getestet habe ich das Plus White 5 Minute Speed Whitening Gel Sensitive.
Das Gel gibt es, soweit ich weiß, nicht in Deutschland. Ich habe es über Amazon bestellt für etwas unter 5 € + noch einmal 5 € für den Versand.
Ursprünglich wollte ich diese White stripes testen, doch die waren mir mit um die 60€ für eine lächerliche Anzahl von Streifen einfach zu teuer.
Das Gel kann man entweder mit einem Wattestäbchen auftragen oder mit der Zahnbürste. Die dritte Variante ist, das Gel wie beim Zahnarzt in Mundstücke zu füllen, die dann auf den Zähnen sitzen. Da diese nicht mitgeliefert werden, wäre das ein weiterer Kostenpunkt.
Ich habe mich für die Wattestäbchen Variante entschieden und kann sagen: Es funktioniert.
Das Gel wird für 2 Wochen 2x täglich aufgetragen (ich mache es morgens und abends). Wirken soll es schon nach 5 min., für starke Verfärbungen soll man es aber 15-20 min. einwirken lassen.
Ich bin bei 10 min. Einwirkzeit angekommen, das Gel hat nämlich leider auch Nachteile.
Die Konsistenz ist sehr fest, es ist schwer das Gel richtig zu verteilen. Wenn man es einwirken lässt, hat man eine dicke, glibberige Schicht auf den Zähnen, die es fast nicht möglich macht den Mund zu schließen. Der Geschmack ist nicht richtig eklig, aber auch nicht so lecker wie Zahnpasta, abgesehen davon hab ich ständig Angst zu schlucken, weil man sich ja ausrechnen kann, dass irgendeine Chemikalie die Zähne weißer macht ;-)
Alles in allem ziemlich eklig. Sprechen ist unmöglich für die Zeit, wo man das Gel auf den Zähnen hat, es sei denn man möchte riskieren alles voll zu spucken. Am besten ist es wohl, das gel unter der Dusche drauf zu machen, dann kann man im Zweifelsfall einfach alles ausspucken.
Generell würde ich aber ohnehin empfehlen es a) nur zuhause anzuwenden und dann b) in der Nähe eines Waschbeckens zu bleiben.
Trotz dieser Unannehmlichkeiten gibt es von mir eine Kaufempfehlung. Es ist wirklich preiswert und ich sehe bereits nach den ersten Tagen Veränderungen. Die Tube wird vermutlich ewig halten, da man nicht so viel Gel auf ein mal benötigt und sie außerdem riesig ist (verglichen mit einer Zahnpastatube).
Auf der Tube selbst stehen keine genauen Anweisungen in diese Richtung, ich würde aber empfehlen vor der Anwendung eine Mundspülung zu benutzen, damit man wirklich gereinigte Zähne hat und nach der Anwendung die Zähne zu putzen. Gelreste werden dann noch gut verteilt und schließlich auch wirklich ausgespuckt, es hält sich nämlich hartnäckig in Zwischenräumen. Helfen kann es auch den Mund mit Wasser zu füllen und dann mit einem Finger die Zähen entlang zu gehen (macht das besser ohne Zuschauer ;-)).
Ich hoffe das hat euch geholfen und wünsche euch viel Spaß mit hoffentlich bald weißeren Zähnen :-)
Folgt mir auf Twitter für mehr Infos und Updates! :-)
Hey,
this is my review for everybody who would like to have whiter teeth! I tested the Plus White 5 Minute Speed Whitening Gel Sensitive.
We do not have the gel in Germany, I think it is a US product but you can buy it at Amazon. I paid a bit less than 5 € for the product and another 5 € for the delivery.
At the beginning I wanted to try white stripes that whiten the teeth but the prices I found for them were a lot too much (~60 € for 25 stripes) so I think 10 € is worth a try.
You can apply the gel with a cotton swab, your tooth brush or in a mouth tray. They do not deliver the mouth tray with the gel, so I did not test that version.
I prefere to apply it with the cotton swab and I can say: It works!!
You have to apply the gel 2x a day for 2 weeks ( I do it in the morning and before going to bed). 5 Minutes shall be enough to see results, 15-20 min. if you have very stained teeth. I leave it on my teeth for about 10 min., longer is almost impossible because here come the disadvantages:
It is hard to distribute the gel as it sticks to the cotton swab and hardly gets smoother while applying. This leads to a very thick and slimy layer on your teeth that makes it almost impossible to shut your mouth. The taste is not bad but not as nice as tooth paste plus I am afraid to swollow some of the gel as you can imagine that it needs chemicals to whiten your teeth ;-)
It is impossible to speak while you have the gel on your teeth, except you want to spill it all out while talking. I think the best way is to "wear" it in the shower because there it is no problem to get rid of it at any time. Generally I would recommend to only apply it at home and stay close to a basin!
Though this might all sound bad to you I would recommend to buy it!
It has a good price and even after a few days I can see a difference. The tube might last forever as you need a small amount and the tube is giant! (compared to tooth paste)
There are no clear instructions on the tube but I would use a mouth wash before applying the gel, to make sure your teeth are clean and I would use a tooth brush afterwards. Like this you make sure that the rest of the gel has some effect on your teeth and at the end you really don't have anything left in your mouth. It is very likely to stick between your teeth so make sure you really get rid of all of it. It may help as well to put some water in your mouth and then use your finger to clean your teeth (but better do that without someone else watching.. ;-)).
I hope this was helpful for you!
Have fun with your whiter and brighter teeth :-)
Follow me on Twitter for more information and updates! :-)
Mittwoch, 12. September 2012
Gelmodellage - Refill / Auffüllen
Hier eine kurze Erklärung, wie mit dem Equipment, das ich in meinem anderen Post >>hier<< vorgestellt habe, Gelnägel aufgefüllt werden. Das Video ist in zwei Teile aufgeteilt.
Viel Spaß :)
This is a short instruction how you can refill your nails with the equipment that I presented in my other post>>here<< The video is separated in two parts.
Have fun :)
Twitter :-)
(lovely pic, isn't it? :D)
Viel Spaß :)
This is a short instruction how you can refill your nails with the equipment that I presented in my other post>>here<< The video is separated in two parts.
Have fun :)
Twitter :-)
Montag, 10. September 2012
Gelmodellage - Nail equipment
So im Folgenden ein Paar Bilder des Zubehörs, das ich nutze, um meine Nägel mit Gel zu machen. Die Firmen sind unterschiedlich und meine bisherige Auswahl, die sich auch wieder ändern kann. Momentan sieht es so aus :-)
In the following you will see the equipment that I use to do my nails. It's from different brands and just what I use up till now. Those things may change in future.
At the moment, this is what I use :-)
.JPG)
1. Ein Hufeisenstäbchen
+Ein Rosenholzstäbchen, um die Nagelhaut
zurück zu schieben und die Kurve des French zu formen.
1. A cuticle pusher + A rosewood stick to push the cutivle and shape the line of the french white.
2. Der Nagelknipser für die Tips.
2. A nailcutter for tips.
3. Ein schräger Pinsel.
3. An angular brush.
4. Ein Spotswirl für Designs.
4. A Spotswirl for designs.
5. Ein normaler Pinsel, nicht zu groß
5. A normal brush, not too big.
.JPG)
Zwei unterschiedliche Primer, damit das Gel später auf dem Nagel hält.
Two different primers, they make the gel stick to the nail.

1. Eine gebogene Feile, um die Nägel zu kürzen und das Gel aus den Seiten des Nagels heraus zu feilen.
1. A curved file to shap and shorten the nails and to get the gel out of the sides of the nails.
2. Eine gerade Feile.
2. A normal file.
3. Ein Buffer, um kleine Unebenheiten auf dem Nagel zu korrigieren und den Nagel zu mattieren.
3. A buffer, to eliminate smaller unevenness and to mat the nail.
4. Ein Pinsel, um den Nagelstaub zu entfernen.
4. A brush to get rid of the nail dust.

Cleaner, zum entfernen von Fetten und säubern zwischendurch.
Cleaner to remove fat and clean the nail between the single steps.

1. Primergel, kann zusätzlich oder an Stelle des Primers verwendet werden als erste Schicht.
1. Primergel, can be used additionally to the primer or without primer as first layer.
2. Aufbaugel, 1. oder 2. Schicht, Modelliert den Nagelaufbau.
2. Builder gel, 1. or 2. layer. Builds up the artificial nail.

1.Camouflagegel, empfehlenswert an Stelle des Aufbaugels, wenn French oder Designs gemacht werden sollen und das Naturnagelweiß nicht durchschimmern soll.
1. Camouflagegel, should be used in place of the builder gel if french or designs are planned and the natural white of the nail shall be covered.
2. Frenchgel (weiß).
2. Frenchgel (white).
3. Versiegelungsgel, als dünne Abschlussschicht.
3. Finish gel, the last thin layer.

Acetonfreier Nagellackentfernen, um Nagellack zu entfernen, bevor die Modellage aufgetragen wird.
Acetonfree nailpolish remover, to remove nailpolish before building up the gel.

1. Nagelweißer, verleiht der Modellage ein weißeres Finish.
1. Nail whitener, applies a whiter finish to the gel nails.
2. Nagelhärter, kann die Nägel nach einer Modellage stärken oder ein Auffüllen noch ein paar Tage hinauszögern, wenn die Modellage heraus wächst.
2. Nailhardener, strengthens the nail after removing the gel nails or can add some days when the nails need to be refilled.

Guter Tipkleber, damit die Tips wirklich halten! Einfacher Sekundenkleber oder Drogerieprodukte sind nicht geeignet!
A good Tipglue, to make the tips last. Do not buy those at a grocery store!

Leider lädt blogger das Bild nur so hoch. Das ist die UV-Lampe, die man zum aushärten benötigt.
Unfortunately blogger only uploads the pic like this. This is the UV-lamp that you need to harden the nails.
Kiko - Nails / Nägel

(Please scroll down for English version)
Noch einer meiner Favoriten! Kiko Nagellacke :-) Schon wenn man einen Kikoladen betritt muss man einfach auf die Wand mit den Lacken gucken. Von hell nach dunkel in allen Farben in jedem Ton: der Traum eines jeden Mädchens ;-)
Dazu sind die Lacke günstig, 2,50 € während Aktionen auch schon einmal 1,50 €. Der Halt ist gut und ich verwende sie auch gerne in Kombination mit Gelmodelagen, da sie das Gel nicht angreifen und sich gut für Designs eignen. Vielleicht blogge ich dazu auch mal einen Beitrag oder ein Video.
Einziges Manko: Sie brauchen lange zum Trocknen und während dieser Zeit muss man wirklich aufpassen, dass gerade die hellen Farben nicht vom Nagel laufen. Das Warten ist das Farbergebnis aber in jedem Fall wert.
Im Bild ein Auszug aus meiner Farbsammlung, jedes Mal wenn ich an einem Kikoladen vorbei gehe, kommt ganz sicher ein Fläschchen dazu und das geht nicht nur in Deutschland. Kiko kommt aus Italien und erobert nach und nach Europa.
Wenn ihr an einem Kiko vorbei kommt, wünsche ich euch ganz viel Spaß beim Lack-Shoppen!!
Liebe Grüße

Another one of my favourites! Kiko nail polish :-) In the moment that you set a foot into a Kiko store you can't do anything else but staring at the shelf of nail polishes that covers one of the walls. They have them from light to dark in every colour and every shade: Every girl's dream ;-)
Plus they are not too expensive. I usually pay 2,50 € when they are on sales 1,50 €. They last a long time and I love to combine them with my gel nails as they do not attack the gel and are great to draw designs. Maybe I will blog on that or do a video about it.
Only disadvantage: They need some time to dry and during that time you have to pay attention that especially lighter colours don't run off your nails. But the waiting is worth it!
In the picture you see an example of my Kiko-colour-collection. I can be sure that I will buy a new one every time I walk by a Kiko store. Not too difficult as Kiko is coming from Italy all over Europe.
If you walk by a Kiko store have fun trying all the polishes!
Lots of love
Easy Salad on a Stick

(please scroll down for the English version)
Eine kurze, und wie ich finde super coole Idee zum Grillen und als Finger-Food auf Partys:
Salat am Spieß!
Ich liebe Tomate-Mozzarella-Salat, aber da normalerweise jede Menge Soße dabei ist, wird das ganze auf Partys schnell zur Sauerei (vor allem auf Papptellern).
Deshalb einfach kleine Tomaten, Mozzarellakugeln (gibt es so fertig z.B. bei Aldi) und Basilikumblätter aufspießen und mit italienischen Kräutern (oder was sonst gefällt) bestreuen.
Wer es näher am Original möchte kann auch Balsamicoessig auf den Mozzarella streichen.
Für kleinere Häppchen einfach Zahnstocher verwenden, dann mit jeweils nur einer Tomate, Basilikum und Mozzarella. Beim Mozzarella immer darauf achten, dass er gut abgetropft ist.
Wer es näher am Original möchte kann auch Balsamicoessig auf den Mozzarella streichen.
Für kleinere Häppchen einfach Zahnstocher verwenden, dann mit jeweils nur einer Tomate, Basilikum und Mozzarella. Beim Mozzarella immer darauf achten, dass er gut abgetropft ist.
Guten Appetit und viel Spaß beim Ausprobieren.
English
A short, and as I think, super cool idea for a BBQ or a party: Salad on a stick!
I love tomato with mozzarella but if you offer it at a party you will get a whole mess with the sauce especially by using paper plates.
So just make it finger-food!
Some small tomatoes with mozzarella balls (e.g. from Aldi) and basil put on a stick! Then just put some spice on that you like or if you prefere the traditional version, put some balsamic vinegar on the mozzarella balls.
I love the idea and hope you enjoy it as much as I do!
Sonntag, 9. September 2012
Fa - Fantasy Moments Dark Diamonds & Jadeblüte

Hallo :-)
Heute ein kleiner Bericht über das Fa Fantasy Moments Dark Diamonds, das ich neu getestet habe. Die Verpackung ist, wie ihr seht, relativ dunkel gehalten und etwas geheimnisvoll.
Die kleinen rosa Blüten ließen mich erst denken, es sei ein typisches Mädchen-rosa-Blümchen-Duschgel, aber weit gefehlt.
Der Geruch ist sehr intensiv und eher schwer. Es hat nicht viel Süßliches und erinnert mich stellenweise an Duft, den man in Männerduschgel findet.
Auf der Haut fühlt es sich gut an. Ich würde nicht sagen, dass es sich besonders von anderen Duschgelen abhebt, aber die Haut fühlt sich nach der Dusche trotzdem angenehm weich an.
Mir persönlich gefällt es ganz gut. Ich werde es weiter benutzen, weiß aber noch nicht, ob ich es danach wieder kaufen werde. Schwierig stelle ich es mir vor, nach dem Duschen Parfum zu verwenden, da der Geruch sehr intensiv ist und sehr eigen.
Wer nicht auf typische Mädchen-Duschgele steht, die immer nach Obstsalat riechen, wird sich über diese Abwechslung freuen!
Follow me :-)
Hey :-)
Today I would like to present you the Fa Fantasy Moments showergel that I tested the first time this morning. The wrapping is, as you can see, quite dark and a bit mysterious.
The little pink flowers made me think this was a typical girly showergel - it is not!
The smell is very intense and rather heavy. It is not sweet and reminds me of a smell that I know from showergel for men.
The Fa Fantasy Moments showergel feels good on the skin. It does not differ a lot from other showergels but still my skin feels soft after using it.
I personally like it. I will continue using it though I am not sure jet whether I will buy it again. I imagine it to be difficult in combination with perfume as the smell of the showergel is that intense.
People that don't like typical girly-stuff will love that this one does not smell like a fruit-salad-something.
Hope you enjoyed!
Follow me :-)
Paul Mitchell - Super Skinny Serum
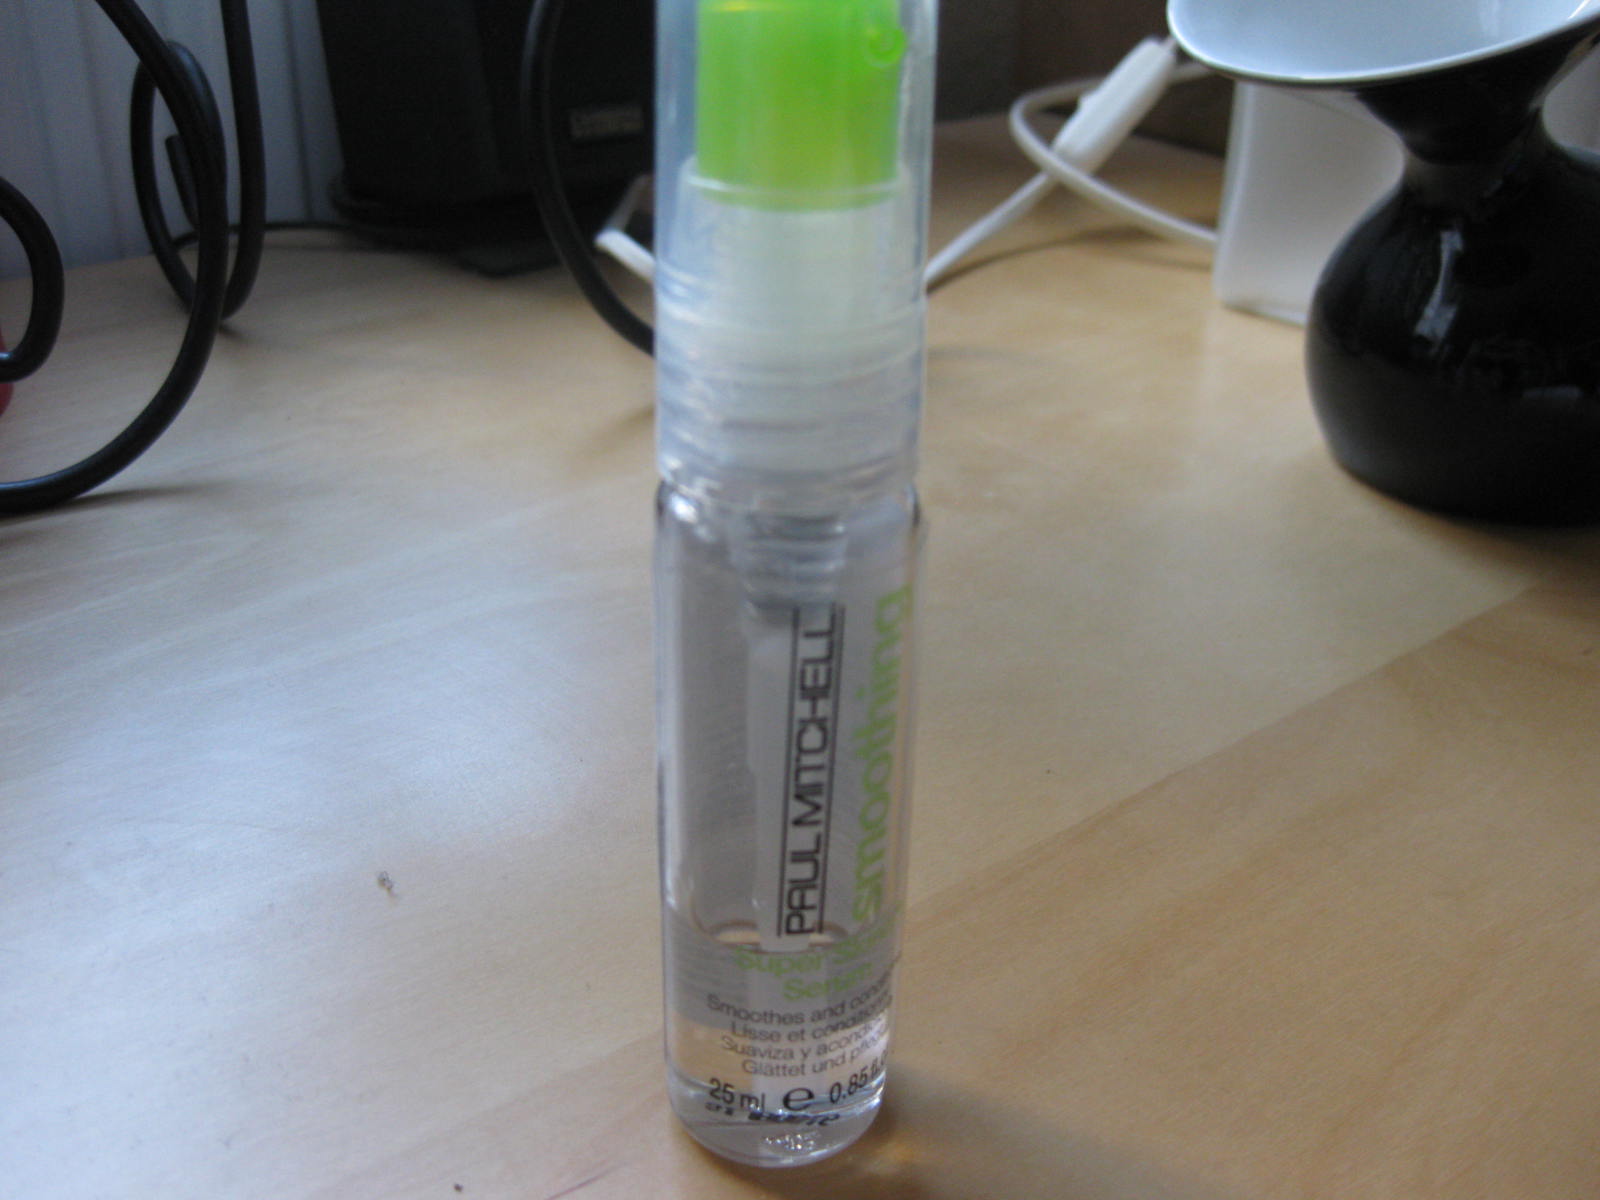
Eins meiner Haar-Must-Haves: Das Paul Mitchell Super Skinny Serum.
Perfekt bei krausem Haar, Spröden Spitzen und hochstehenden kürzeren Haaren. Normalerweise wäre mir Paul Mitchell zu teuer, das Super Skinny Serum habe ich mir gekauft, weil ich einen Amazongutschein hatte und die Marke vorher von meinem Friseur empfohlen bekommen habe.
Die Flasche beinhaltet 25 ml und hält bei mir bereits seit Oktober 2011, weil schon eine ganz kleine Menge ausreicht.
Ich benutze es, wenn ich keine Lust habe meine Haare zu glätten und sie nur glatt föhnen möchte. Auch gut ist es, wenn die Spitzen eigentlich schon längst wieder einen Schnitt nötig hätten und man die Zeit zum Friseurbesuch überbrücken muss. Einfach ein wenig in die Spitzen ziehen und die Haare fügen sich zusammen ohne zu kleben.
Nach dem Glätten der Haare oder im Winter, wenn sich die Haare schnell aufladen, hilft das Serum die Haare herunter zu glätten und Glanz zu verleihen.
Einziger Minuspunkt für mich ist, dass das Serum Alkohol enthält. Haarpflege und Alkohol passt für mich eigentlich nicht ganz zusammen, in diesem Fall heiligt für mich aber der Zweck die Mittel.
Liebste Grüße :-)
Follow me :-)
This is one of my hair-must-haves: The Paul Mitchell Super Skinny Serum.
It is perfect if you have fizzy hair, split ends or upstanding shorter hair. Usually I would find Paul Mitchell too expensive but in this case I made an exeption as I had a voucher for amazon and my hairdresser's recommendation.
There are 25ml in the bottle. Still I have some of the product though I started using it in october 2011. You can see, a little amount serves for a long time.
I use it when I am not in the mood to straighten my hair and only want to have it straight by blow-drying it. As well when my ends need a cut but I have some time to go until I see my hairdresser. Just put a little amount in your ends and they will be smooth and nice without sticking.
After straightening my hair or in winter, when my hair gets static easily I love to use it to smooth smaller hair down and give a little shine.
The only thing I criticise is that the product contains alcohol. From my opinion this is a no-go for dry hair. BUT the effect is that great, that I tend to close both eyes and do not think about the alochol anymore ;-)
Lots of love
Follow me :-)
Samstag, 8. September 2012
End-of-Summer-Trend-Drink: HUGO
 |
| Schöner natürlich noch mit Limette als Deko |
Follow me on Twitter :-)
Hugo ist meiner Meinung nach DER neue Frauenschwarm! Der Sommer in Deutschland gibt in den letzten Zügen erst richtig Gas und da ist Hugo der perfekte Begleiter zum Herunterkühlen :-)
Viele schwören ja auf Aperol Spritz, der ist mir aber ehrlich gesagt viel zu bitter.
Im Bild seht ihr meinen Hugo von gestern abend und natürlich im Folgenden mein Lieblingsrezept (ja, von Mama :-D).
Natürlich sollte man etwas aufpassen, da der Hugo Alkohol enthält (an dieser Stelle hebe ich mahnend meinen Zeigefinger), ich behaupte aber er schmeckt auch mit alkoholfreiem Prosecco und der Erfrischungseffekt bleibt!
Rezept:
3 Blätter Minze in ein Glas geben und leicht andrücken, damit der Saft austritt
1 Limettenscheibe mit hinein geben
1-2 Eiswürfel dazu (oder mehr)
150 ml Prosecco
2cl (ein Shotglas) Holunderblütensirup
Saft einer halben Limette (oder, wenn es weniger sauer sein soll 100 ml Sprudelwasser)
Viel Spaß beim Erfrischen! :-)
Follow me on Twitter :-)
This summer every woman has got a crush on one guy: HUGO!!
In Germany the summer is just about to start when it comes to its end so for the last hot days I recommend this refreshing drink! I know a lot of people that love Aperol Spritz (another trend drink) but I find it too bitter.
In the picture you see my Hugo that I had yesterday evening and in the following my favourit recipe (yes, it's how my mum does it :-D).
Of course be careful with the amount that you drink as Hugo contains alcohol (I have my finger up while looking at you very sincerely!), but I think you can use alcoholfree prosecco as well and it will still be refreshing.
Recipe:
Put 3 leaves of mint in a glass and press a bit so the juice comes out
1 clice of lime on top
1-2 ice cubes (or more)
150 ml prosecco
2 cl ( a shot) of elderflower sirup
juice of half a lime (or if you prefere it less sour 100 ml of water with gas)
Have fun and I hope you enjoy! :-)
It's (not) magic - Balea young soft & care 3 in 1

Follow me on Twitter :-)
Vor einiger Zeit bin ich bei dm über ein Produkt von Balea gestolpert:
Balea Young - soft & care 3 in 1. Das Produkt soll sowohl als Reinigung, als Peeling als auch als Maske funktionieren. Der Hauptwirkstoff ist Fruchtsäure.
Ich hab es jetzt seit ein paar Monate täglich benutzt und muss sagen, dass es mich leider nicht auf ganzer Linie überzeugt.
Reinigung & Peeling
Als Reinigungsprodukt mit Peelingeffekt hat es mich überzeugt. Ich würde das jedoch nicht als zwei separate Produkte bezeichnen. Schließlich kann man sich schlecht das Gesicht damit reinigen ohne auch gleichzeitig zu peelen, logisch oder? ;-)
Die Peelingpartikel sind relativ grob. Man merkt sie sehr intensiv auf der Haut und wenn man an empfindlichen Stellen zu feste schrubbt, kann es die Haut sehr reizen.
Nach der Anwendung war meine Haut oft sehr trocken (was aber auch mein individuelles Problem sein kann).
Der Effekt gegen Unreinheiten war eher kurzfristig. Am Anfang sehr erfolgreich, ließ er mit der Zeit nach.
Deswegen würde ich sagen eher als kurzfristige Notfalllösung zu verwenden als als langfristige Pflege.
Maske
Die Konsistenz ist sehr Maskenartig, allerdings braucht man eine ganze Menge Produkt, um das ganze Gesicht zu bedecken. Ich hab es nur ein zwei Mal als Maske verwendet, die Haut war danach weich, aber stellenweise auch trocken. Der Effekt war für mich nicht so überragend, dass ich es öfter benutzen wollte.
Preis
In der Tube befinden sich 150 ml, dafür habe ich (wenn ich mich richtig erinnere) etwas um die 2,50€ gezahlt. Ich habe das Produkt jetzt seit ca. 6 Monaten und täglich in Benutzung. Trotzdem ist immernoch etwas in der Tube (vom äußeren Fühlen würde ich schätzen etwas weniger als 1/3).
Empfehlung
Jein. Nicht als Langzeitpflege und nicht, wenn man wirklich auf der Suche nach einem tollen 3 in 1 Produkt ist. Für den Preis ist es okay, aber ich schätze für mehr Geld gibt es Produkte mit besserem Ergebnis.
Follow me on Twitter :-)
Some time ago I came across a Product by Balea at dm (a grocery store):
Balea Young - soft & care 3 in 1. The product shall work as a facewash, a peeling and a facemask. The main ingredient is fruit acid.
I used it every day for a couple of months and I have to say that it didn't convince me in every point.
Facewash & Peeling
It convinced me in the sence of a facewash with peeling effect, but I would not call it two separate products (as you cannot wash your face with it, without peeling it at the same time, logical? ;-))
The pieces in the product were very hard so if you scrubb to much it can harm a sensitive skin. My skin used to be dry after using the product.
The effect against spots was very good at the beginning but got less and less over time. For me it is more like an emergency solution for a short period of time than a product to use every day.
Mask
The texture is very similar to a normal mask, but you need a lot of the product to cover your whole face. I only used it once or twice as a mask and though my skin felt soft afterwards it did not convince me in that sense of usage because I had a lot of dry parts, too.
Price
There are 150 ml in the tube and I paid about 2,50 € for it. I used it daily for about 6 months and still (as far as I can tell from outsite the tube) there is still 1/3 inside.
Recommendation
Yes and no. Not if you want to use it in long term and not if you are looking for a really good 3 in 1 product. It is okay as a facewash and thinking of its price. I presume that you can find more expensive but more effective products.
Abonnieren
Posts (Atom)